
I have to be honest, I had never heard of story stones until I read about them in our preschool curriculum – A Year of Playing Skillfully. I’ve probably been living under a rock (pun intended – couldn’t resist), but these are such a neat tactile way to “play” through the Christmas story, and I couldn’t wait to share the idea with my daughter who is my go-to artist when it comes to things like this. She said she could definitely do it, so I gathered the supplies, and she made me a beautiful set of Nativity Story Stones!

It wasn’t super complicated, and you do not have to be an artist to make your own, so I wanted to share with you how we made ours and some variations you can try when making your own!
Find your Story Stone inspiration
I was pleasantly surprised to find a myriad of story stone ideas online, so we picked one that stood out to us, and used that as our inspiration. Unless you are an amazing artist, keep the concept simple. Personally, I like the more simplistic look because it feels more imaginative, but that’s just a preference (and probably has something to do with the fact that I am not an artist!).
Gather your supplies
*Paint Pens –
I should have read up on how to make Story Stones before I handed my daughter sharpie markers and thought that would be sufficient. Then, I made another mistake and bought her a white paint pen that was too wide to use as an outline. Learn from me and just buy this set of paint pens the first time:
They did a great job, and weren’t terribly expensive. No matter what paint pen you go with, be sure it is an extra fine tip or you will just end up with a mess. I also plan to make more story stones for other things, and Megan plans to make some to sell at the local homeschool craft fair, so definitely a good investment!
*River Stones –
I usually have river stones on hand for our Resurrection Garden, but I couldn’t find them, so I purchased a couple of bags from Walmart for $.97 a piece. You can also buy stones that are already black, or buy a bigger bag like this one:
*Craft Paint –
I bought black craft paint as well since our inspiration had a black background. However, you wouldn’t have to do this, or you could use another color as your background.
*Shellac –
Originally, I thought I didn’t need this, but as the kids played with the stones, it became clear, I needed some sort of clear coat to keep the paint from chipping on. You can use a simple spray coat or paint it on. Choose matte or gloss based on your preference.
Paint your base color
Like I said, our inspiration was a black background, so that’s what we did first. Some of the rocks needed a second coat. Thankfully, craft paint dries quickly, so you can paint your base and start painting your “story” all in the same day.
Paint your story
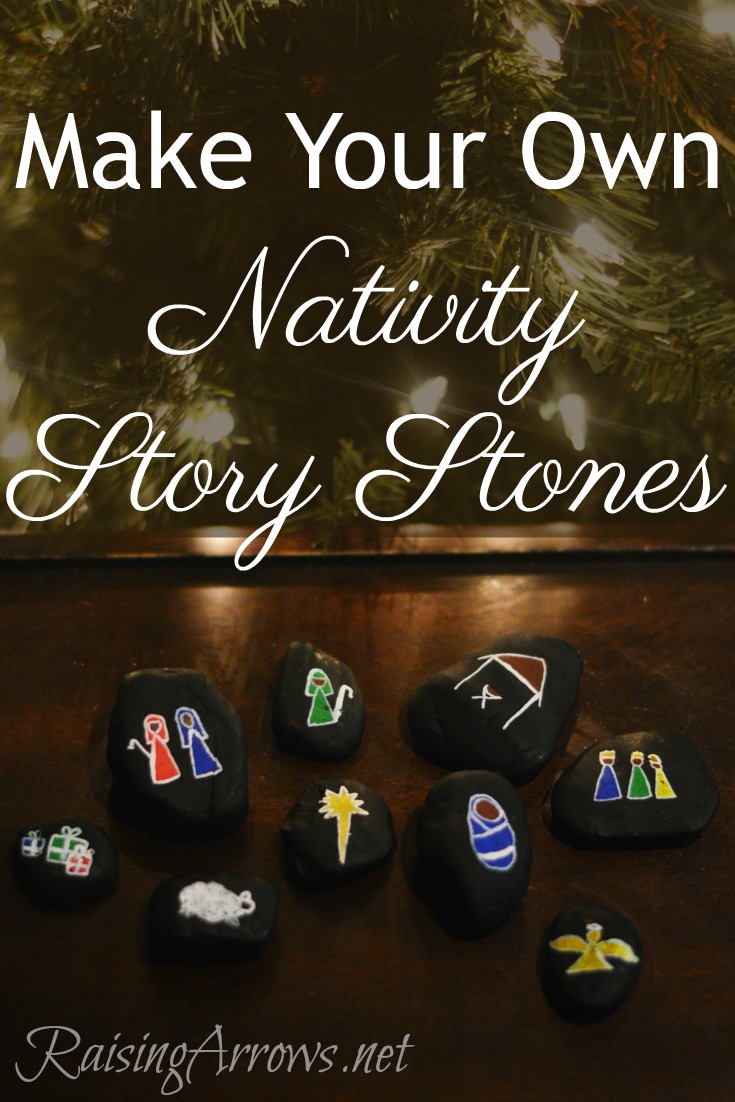
You want your children to be able to group different aspects of the Christmas story together – the wise men bringing gifts, the shepherds watching over their flocks when the angel appears, the star over the manger, etc. We made the following stones:
- Mary & Joseph
- Baby Jesus
- Manger
- Star
- Angel
- Shepherd
- Sheep
- Wise Men
- Gifts

However, you could separate Mary and Joseph so you could have the angel appear to each of them individually or you could add in a donkey or King Herod. It’s totally up to you!
Add a clear coat to protect your paint, let it dry, and then…
Let the children play!
The final step is to let your little ones play with the stones! Start off by reading a simple version of the Christmas story and guiding their play, and then let them enjoy some free play with the story stones.
If the stones are small, only allow your preschoolers to play with them at the table. Mercy is still in no-no’s (the arm braces that keep her hands out of her mouth while she heals from cleft palate surgery), so we snapped this oh-so-cute photo of her playing with them last night!

You can store your Nativity Story Stones in a drawstring bag or a plastic ziploc bag, a box or whatever you can find! We plan to put ours away when we take the decorations down and put them in the Christmas totes so we can find them next year.
Now, see how easy that was?! I’d love to hear from you if you try this project or if you have made other types of Story Stones before!
Sarah T. says
Oh, I LOVE this! Thank you for sharing. I, too, have an at home artist. This is such a great idea. Baby Mercy looks adorable!
Jaime says
I’ve never heard of story stones but will have to do some googling now haha! I see bags of the kinds of stones you mentioned at Dollarama all the time – just as a another suggestion for where to buy them.
Amanda Baker says
Great Idea! I’ve been looking for something different to do this year…something different AND simple. I think I’ve found it! Thanks for sharing!
Lisa says
My kids are out gathering stones now. We will give them a good wash and let them dry.
Thanks so much for this idea, we’re looking forward to our paint pens arriving to use on the stones.
Reggie says
Mercy looks so precious! I remember the doctor mentioning arm braces after my little one’s repair, but I don’t recall ever actually using any. I do remember she ate and drank less while the ‘packing’ was in her mouth (about eight days, I think), but her appetite returned with gusto once it was out.